
Many such links can be found on every page of every website you visit. You can find both internal and external links.
The distinction between internal and exterior links is that the former connect within the same domain, while the latter link to a completely other domain. With thousands of links per site, manually updating them is impossible.
WP Links is the hero that rescues the day in this situation. This plugin is a link management plugin for WordPress. For the time being, let’s concentrate on external links, and I’ll explain how WP Links may simplify the process of managing these links and help you save time.

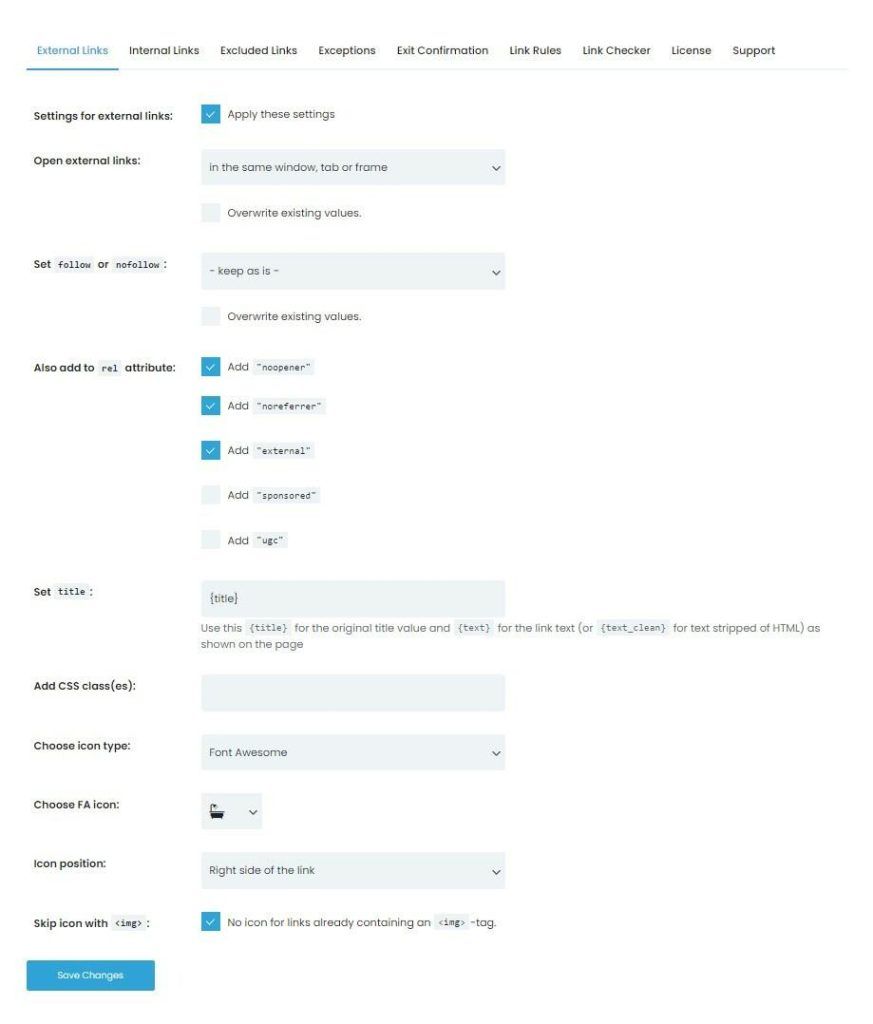
External Links
We’ll start by dispelling some common myths about external links. Numerous configurations and customizations are available. In this manner, updating all of your external links at once is a breeze.
One of the first things you’ll be asked to do is decide whether or not you want external links to open in new windows, tabs, frames, or the current window. You can also choose to open them in the same window or the uppermost frame, but doing so is not advised.
Set them to “follow” or “nofollow,” and then you can modify the rel attribute. “external,” “noopener,” “norefferer,” “sponsored,” and “ugc” are the alternatives here. Among these alternatives is the ability to change the title and text of your document, as well as to compose your own headings and subtitles.
Finally, you can select an icon and add CSS classes. When you right-click on an Image, a Dashicon, or a Font Awesome icon, you’ll see a menu that lets you select the desired icon and set its location.
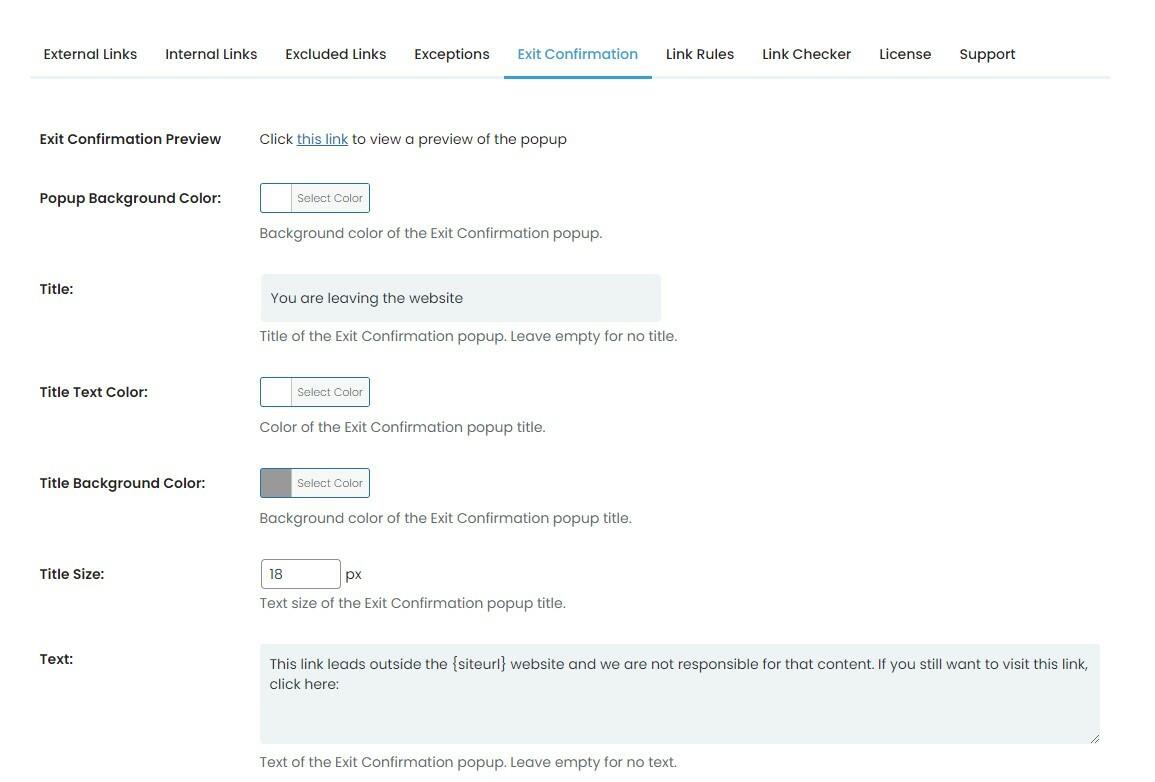
Exit Confirmation
When we are discussing links to other websites, Exit Confirmation proves to be quite useful. With Exit Confirmation, you are responsible for developing the popup that will notify viewers that they are leaving your website in order to visit another one.
You can select the color of the popup from a wheel of different colors, as well as the title of the popup. You have the option of writing what you wish to be the item’s title, after which you can select the title text, background color, and size of the item.
The following thing you may change is the text, and you have the same options as before regarding what the text should say as well as the color and size of the font. Not only can you change the color of the popup, but you can also choose the width and height of the popup when it comes to altering the popup itself.
You also have the option of using a transparent overlay in the background of the popup. In the same way that you may alter the color of the background, title, and text, you can also change the color of the overlay. You can make a button that allows users to stay on the website if you want to provide them the opportunity to do so.
You have options about the wording, size, color, and background of the button to pick from when it comes to the button. After you have made all of your selections and are satisfied with them, you can simply click the “Save changes” button when you are finished.
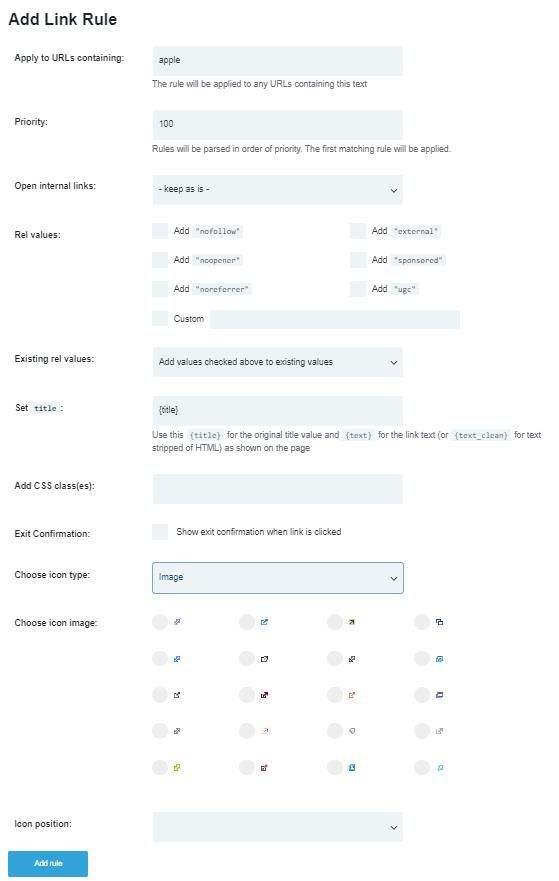
Link Rules
When it comes to link rules, you have the ability to select whatever word you want to search, but you can also add rules so that when you look something up, the results will be altered in accordance with the rules you specified.
When it comes to Link Rules, the first choice is to apply to URLs. This allows you to select a word, and the rule will be applied to any and all URLs that contain that word in the address.
Because the rules will be parsed in the order of their priority, priority is an essential concept. The following drop-down menu is dedicated to internal links, allowing you to select where you want them to open. In addition, you can include a rel property, from which you can select any of the pre-made versions or create your own from scratch.
After selecting the rel attributes you wish to add, you will be given the option to select which ones those characteristics will be added to. You have numerous choices available to you here, and two choices are to either add checked values to the ones already present or merely set checked values.
The following component that can be altered is the title; however, if you don’t want one, you can just leave the text component blank instead. In addition, you can include CSS classes and choose whether or not to display the Exit Confirmation popup when the link is clicked.
The Exit Confirmation popup is a popup that notifies you that you are leaving the page. The next step, but certainly not the least important, is to select an icon.
You have the option of using an Image, Dashicon, or Font Awesome as your icon, and you can choose once more where you want to position it. After determining which options you wish to select and the format in which you desire your link rules to appear, all that is left to do is add the rules.
Conclusion
In this post, we discussed links to external resources and the various methods by which such links might be altered. Our primary focus was on WP Links.
During our conversation, we talked about a few of its features and settings, such as Exit Confirmation and Link Rules, which allow you to manage and maintain the external links on your site. Because everything is totally configurable, you have the ability to choose even the minutest of specifics.
It is time for you to get WP Links and begin taking care of the links outside of WordPress.
