Organize WordPress files and manage your WP media library efficiently with proper folder organization. As your website grows, so does your media collection, making it crucial to keep your images, videos, and documents well-structured. Finding specific files can quickly become time-consuming and frustrating without a proper system, slowing down your workflow and potentially impacting your site’s performance.
Implementing a robust organization strategy for your WordPress media library saves time and enhances your site’s overall functionality. Using plugins designed for media management, you can create a logical folder structure, quickly move and copy files, and streamline your content creation process. This guide will walk you through the steps to effectively organize your WordPress media library, helping you maintain a clutter-free and efficient website.
Importance of Organize your Files in Media Library Folders
Organizing your files in WordPress Media Library folders offers several key advantages that can significantly improve your website management experience. Let’s explore why this practice is crucial for WordPress users.
- Improved file management and organization – Organizing files in media library folders helps streamline your workflow by creating a logical structure for your media assets. This makes it easier to locate specific files quickly, saving time and reducing frustration when managing large collections of images, videos, or documents.
- Enhanced website performance – A well-organized media library can improve website performance. By grouping related files, you can more easily identify and remove unused or duplicate files, reducing server load and improving page load times.
- Better collaboration and teamwork – Organized media folders facilitate smoother collaboration among team members. When multiple users work on the same WordPress site, a clear folder structure helps everyone understand where to find and place files, reducing confusion and improving overall productivity.
- SEO benefits and improved URL structure – Creating a logical folder structure can lead to more meaningful URLs for your media files. This can boost your SEO efforts by incorporating relevant keywords into file paths, making it easier for search engines to understand the context and relevance of your media content.
These benefits highlight the importance of organizing files in media library folders, ultimately leading to a more efficient and effective WordPress website management experience.
How to Organize WordPress Files using WordPress Media Folder Plugin
Organizing your WordPress files with WP Media Library can significantly streamline your media management process. Many WordPress file management plugins are available, including the built-in WordPress plugin, which is free and available to everyone.
Although free, the built-in plugin does not offer extensive features for managing WordPress files. Therefore, you might want to look for a solution like the WordPress Media Folder plugin, which we will be trying out now.
The WP Media Folder plugin simplifies WordPress media management by offering an intuitive folder system with drag-and-drop functionality. It allows users to organize files hierarchically, integrate with third-party storage services, and embed remote videos. The plugin includes batch file management, media filters, and watermark removal.
Here are the steps to use the plugin.
1. Install WP Media Folder Plugin
To install the plugin, you can manually install it, or if you need to install it on a site without direct internet access, download the plugin’s ZIP file from the WordPress plugin repository. Once downloaded, extract the contents and upload the entire folder to your website’s ‘/wp-content/plugins/’ directory using FTP or your hosting control panel’s file manager.
After installation, regardless of the method used, go to your WordPress dashboard’s “Plugins” section and locate ”WP Media Folder” in the list. Click “Activate” next to the plugin name. Upon activation, a new “WP Media Folder” menu item will appear in the left sidebar of your WordPress admin panel, indicating that the plugin is ready for use.
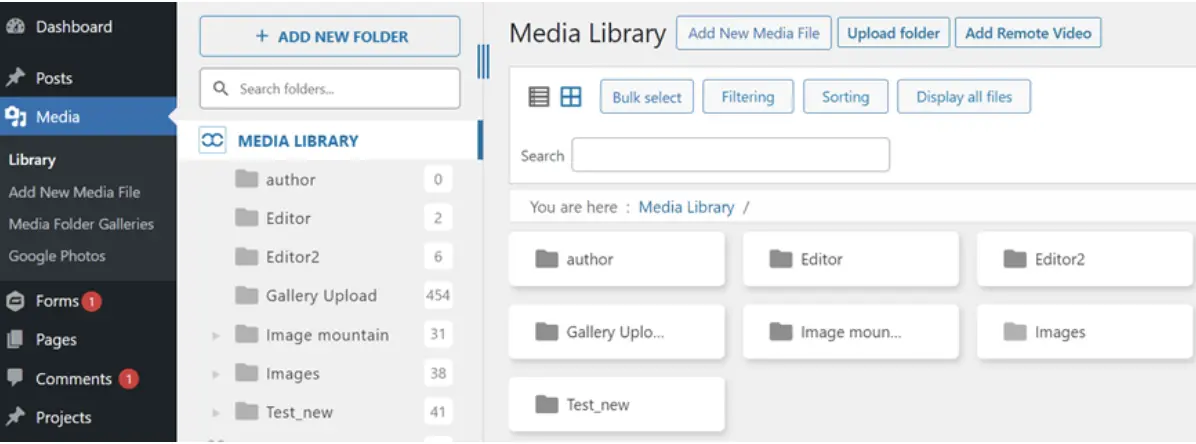
Next, in the Media menu, select Library. Here is the view of the Media Folder with the plugin installed. As shown below, there is also an additional menu option, Add Remote Video.
2. Create New Media Folder
To create a new folder, navigate to the location where you want to create it, such as within an existing folder. However, this time, we will create the folder directly in the MEDIA LIBRARY. Click +Add new folder, then enter the folder name and select Create.
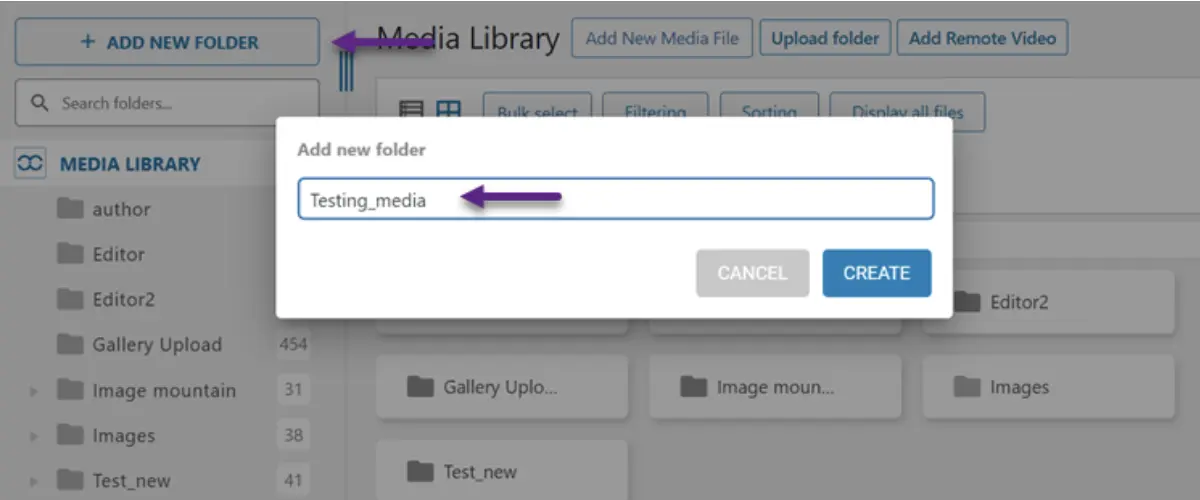
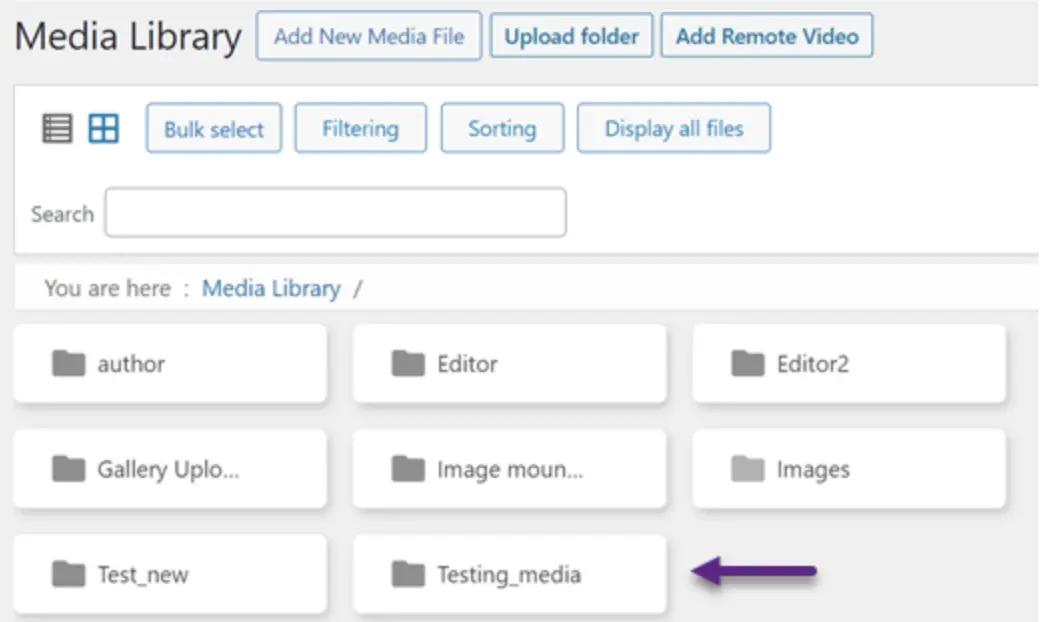
If successful, a new folder will appear with the name you entered, for example, Testing_media.
3. Upload File to Folder
Once the folder has been created, you can upload the files you want to add to WordPress. Select the newly created folder and click Add New Media File to do this.
Then, you will see options to select files or add remote video. This differs from the default WordPress media library, which does not offer Remote Video and Upload Folder options.
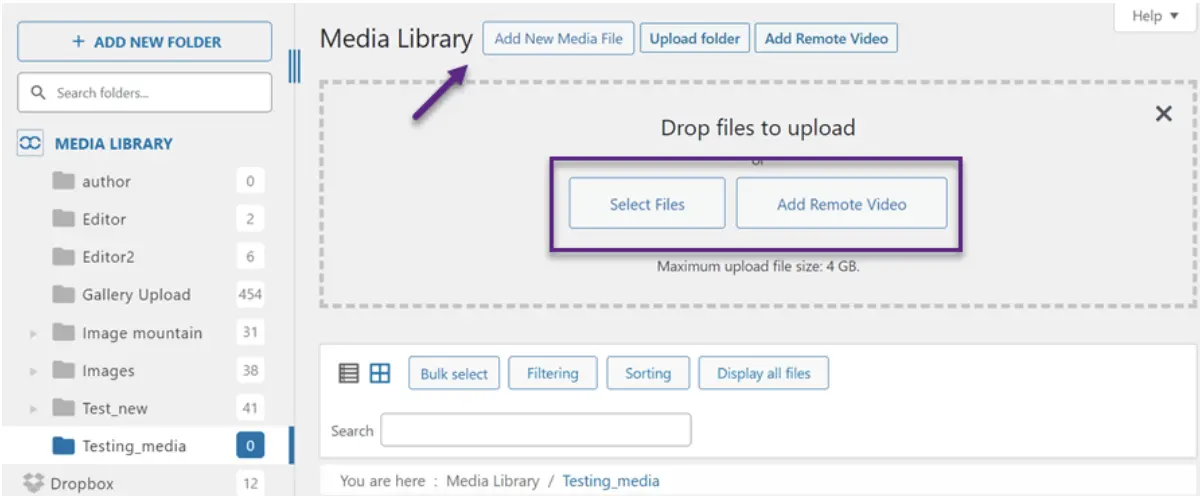
For example, let’s try uploading an image file. The image will appear below if successful, as shown in the following display.
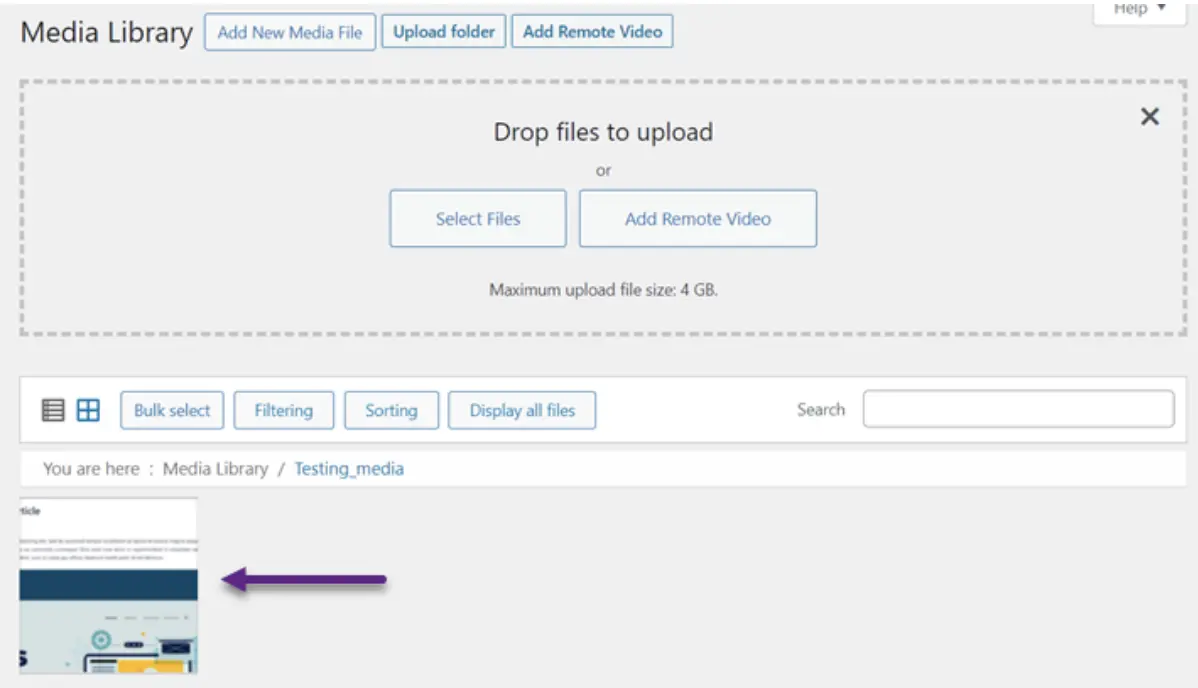
Additionally, a number will appear next to the folder name, indicating the total files within that folder.

How to Move and Copy your Files using Media Folder Plugin
After successfully creating a new folder and uploading files, let’s explore how to move and copy your files easily and quickly.
Sometimes, you might need to relocate an existing media file to a new location. This plugin allows you to move the original file or create a duplicate in the new folder within the WordPress media library.
1. Moving a File to a Folder in the Media Library
First, we will move a file or image to another folder within the WP Media Library. There are two options for doing this. The first is to drag and drop the file into the intended folder. For example, as shown below, we will move it to the Gallery Upload folder.
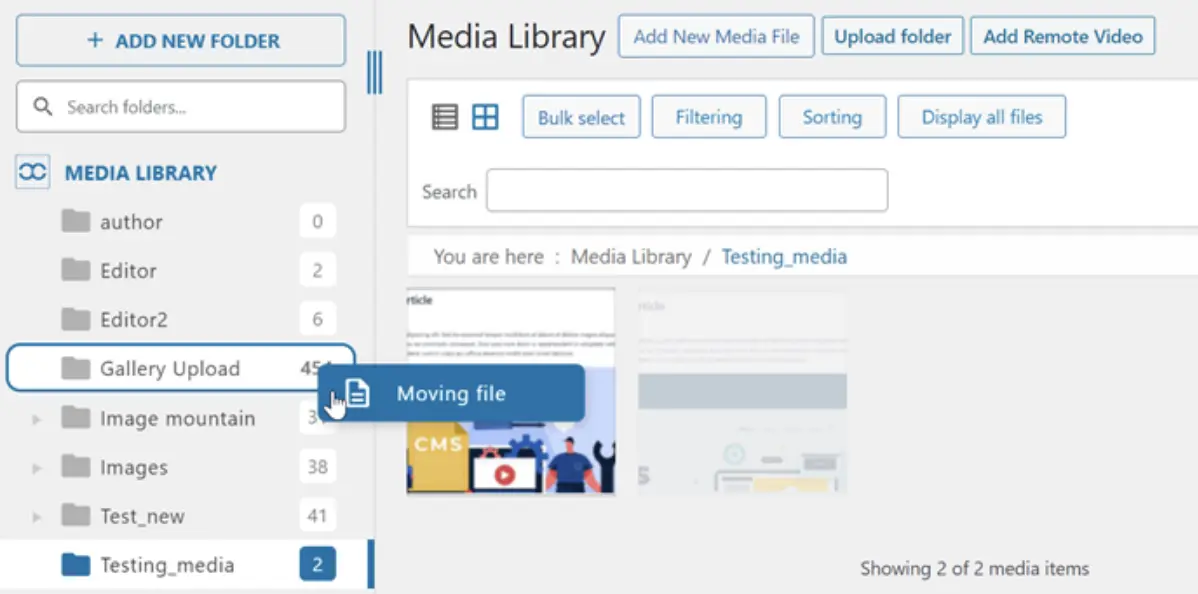
If successful, the image will be moved to the intended folder, as shown in the image below.

The second option is to move the file manually. To do this, right-click the image you want to move, then select Move to / Multi Folders.
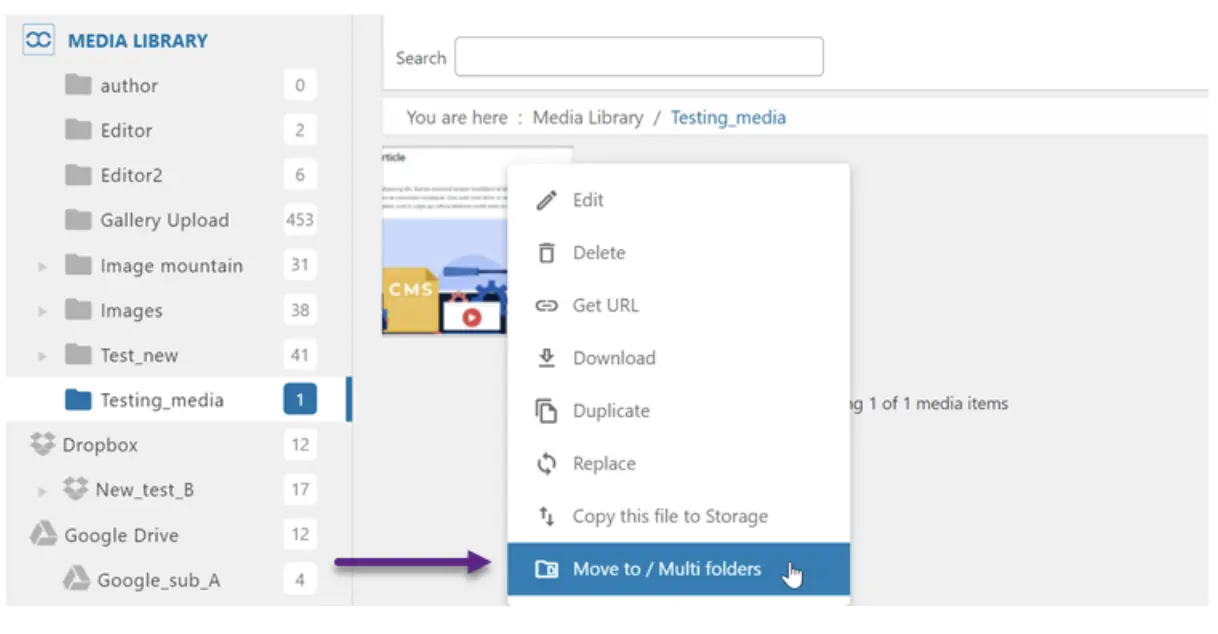
After that, you’ll see many folder options, such as Gallery Upload. Then, click Apply.
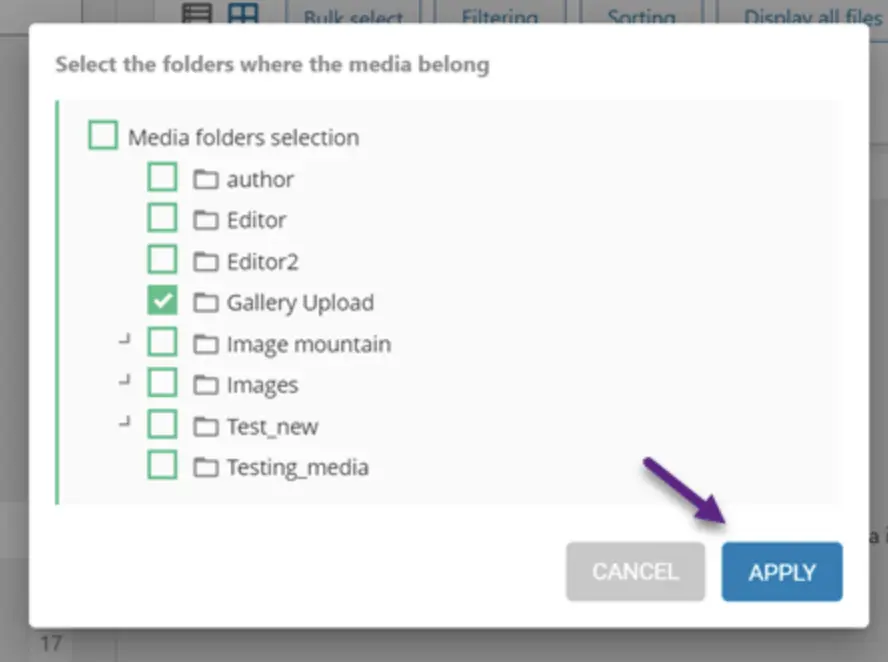
If successful, open the Gallery Upload folder, and the two files that have been moved will appear there. Additionally, the count in the Testing_media folder will show as 0 files.

2. Copying File to a Folder in the Media Library
You can also copy the file and save it to the same folder. Here are the steps. Right-click on the file, then select “Copy this file to Storage.”
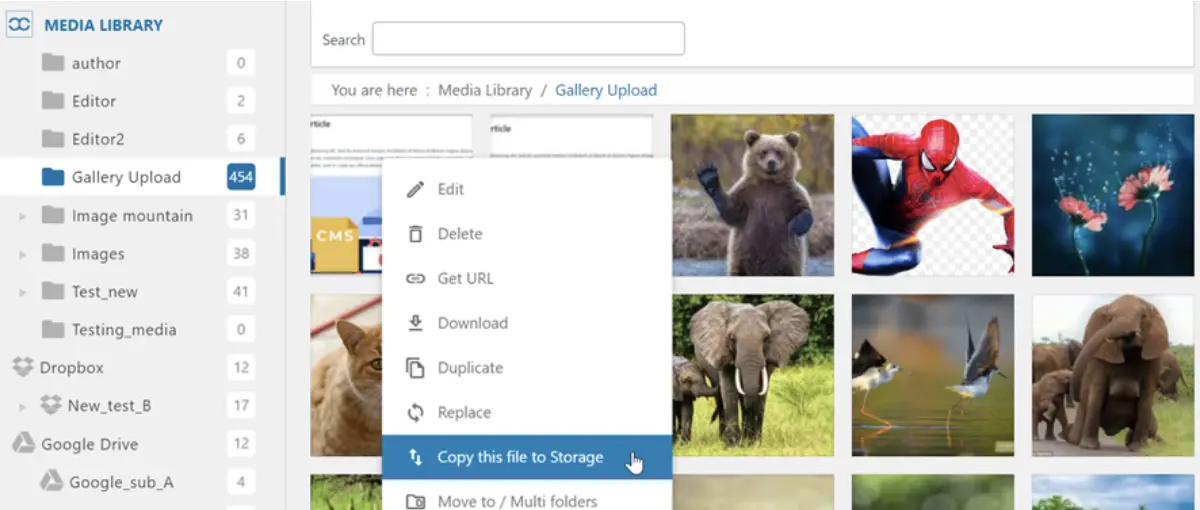
After that, you will receive a notification confirming the file has been successfully copied. However, please note that the file or image will appear in the cloud storage, such as Google Drive, not in the folder itself.
How to Rename Files and Folders in Media Library Folders
The WP Media Folder plugin also allows you to rename folders and files. Below we will discuss the steps one by one.
Rename Folder in Media Library Folders
To rename a folder, right-click on the folder you want to rename, then choose “Rename.” After that, enter the new folder name that you desire.
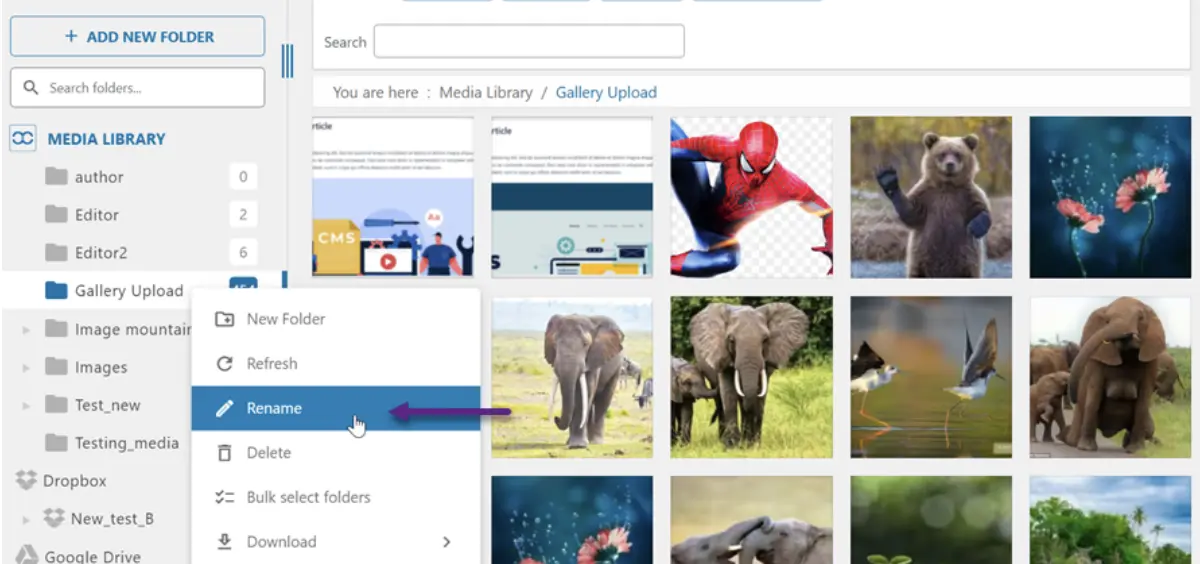
For example, like this, then click Save.

Afterward, you can see that the folder name was successfully changed.
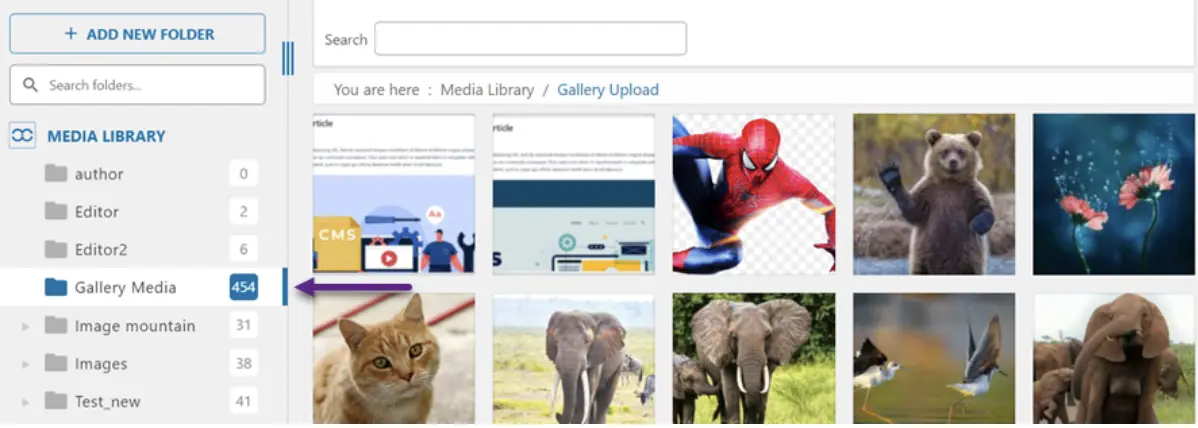
Rename File in Media Library Folders
Next, to rename files, this plugin supports automatic file naming starting when the file is uploaded. This requires a specific configuration. Here are the steps:
- Go to Settings > Rename & Watermark.
- Click on Activate media rename on upload.
- Enter a Pattern, for example: {original name} – {foldername}.
Every file you upload will have its name changed according to this pattern. This helps keep your file names organized and structured.

Afterward, you can set which characters you want to remove from the default file names. Once done, click on Save Changes.
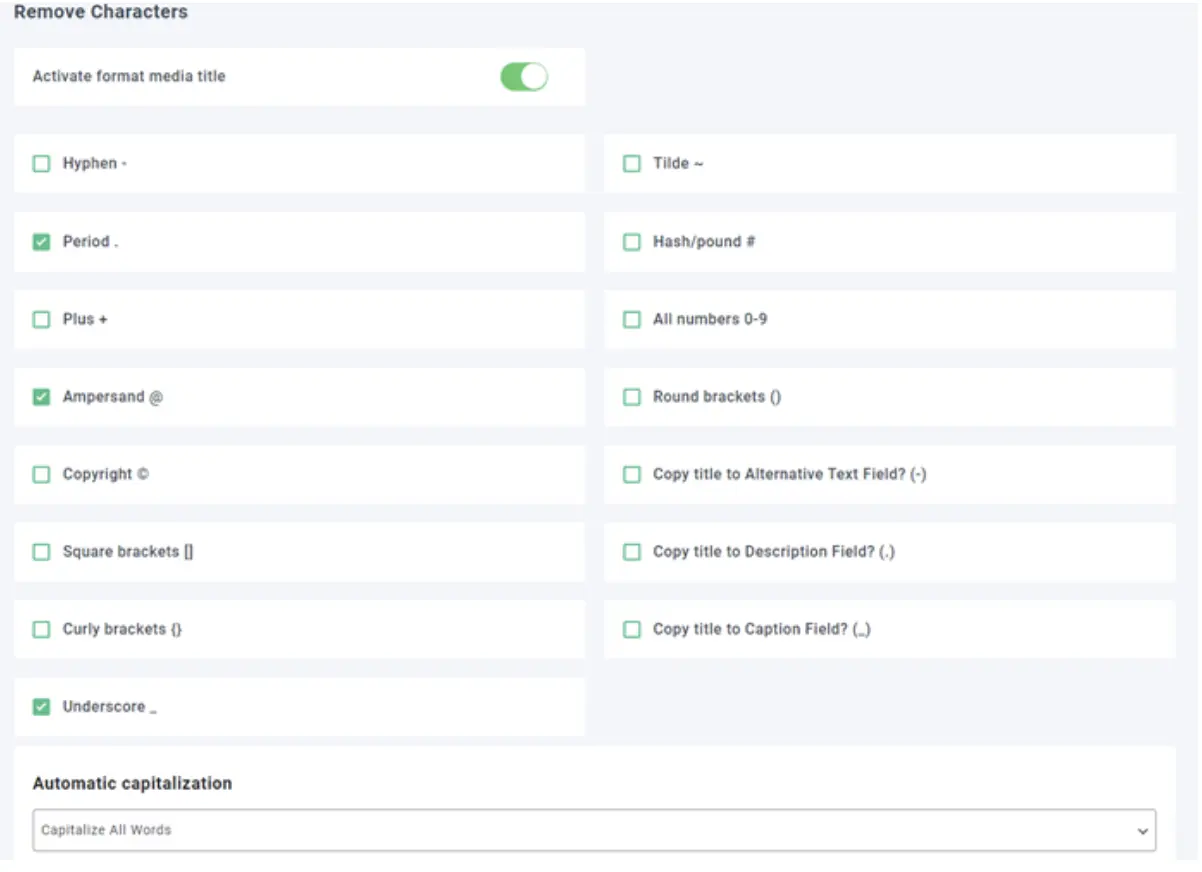
Now let’s try uploading a file and see if automatic renaming works. First, select a file, such as “10webPhoto Gallery.” After successfully uploading it to WordPress, the file name will change with an additional folder name based on the configured pattern.
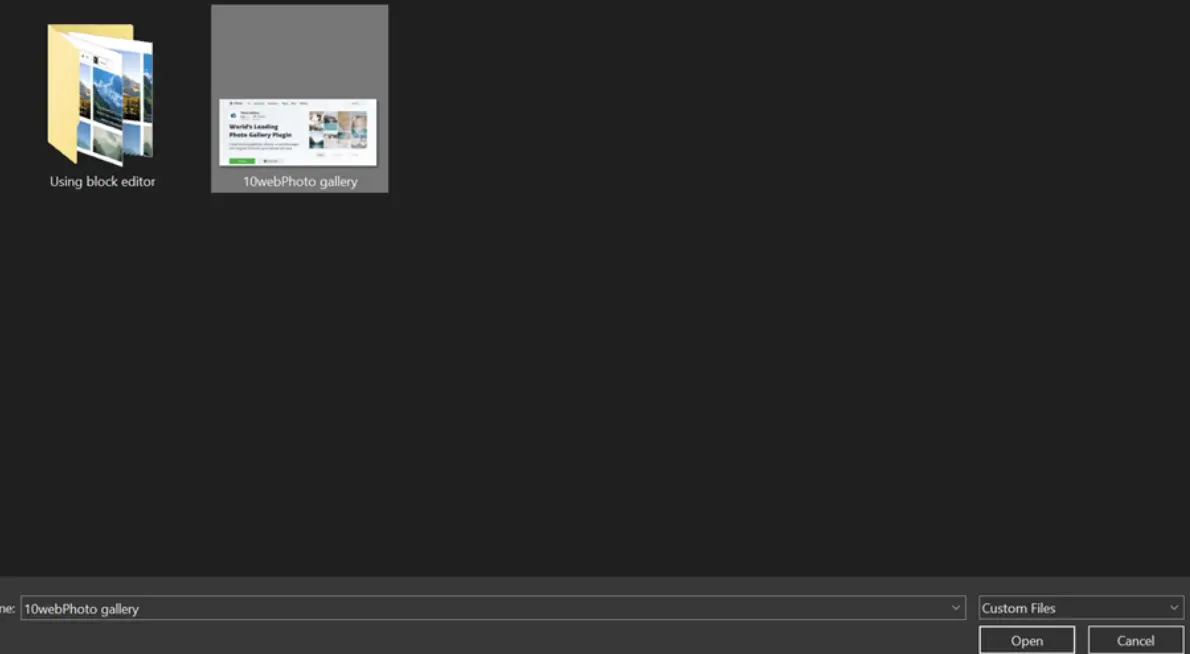
After successfully uploading, the file name will automatically change without you needing to edit it manually.

Conclusion
Organizing your WordPress media library using folders is crucial in maintaining an efficient and well-structured website. Implementing a plugin like WP Media Folder can significantly streamline your media management process, saving time and improving overall site performance.
This article has guided you through the essential steps of installing the plugin, creating folders, uploading files, and efficiently moving or copying media within your WordPress environment.
